I just installed the app. How do I add my rifle and get my first firing solution?
Add your rifle in the Armory with the five-step guided setup, put it on the bench, then enter your range, weather and wind on the Calculate tab and tap Calculate. The Drop Table then gives the hold for each range.
The steps
The same on iPhone and Android. Adding a rifle is free. Calculating with a rifle of your own takes Pro or the 7-day free trial; the five sample rifles that come with the app calculate free.
-
Start the guided setup. Open the Armory tab, tap + and choose Add Rifle. A catalog of rifle makers opens: tap a model to start the setup on it, or tap Add Your Own for a blank rifle. Right after the first-run tour, the Add a Rifle button on the Add a rifle to get started offer does the same.
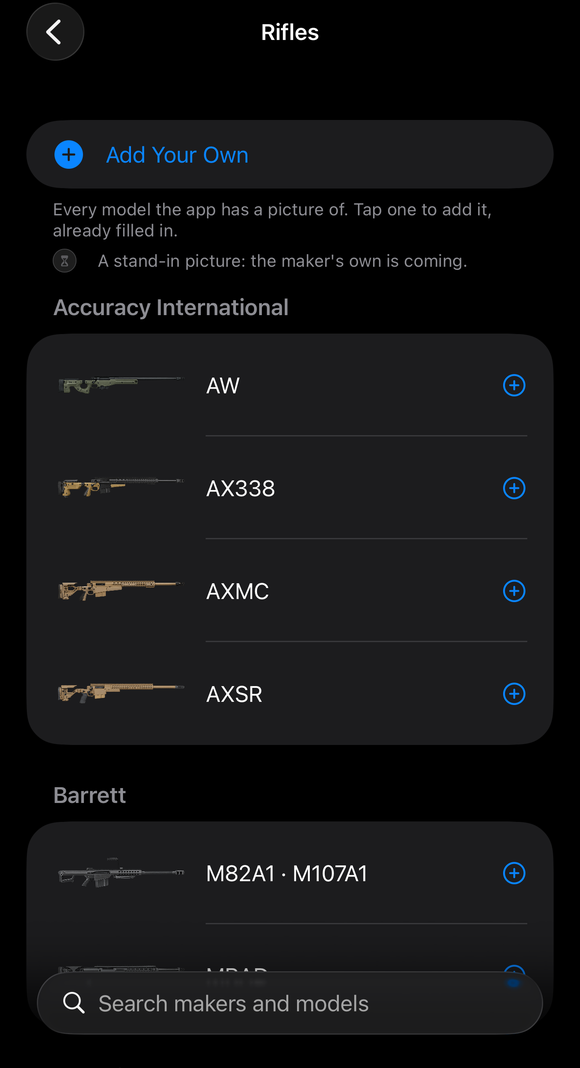
The rifle catalog that Add Rifle opens first: Add Your Own at the top, then makers and models, each with a + to start the setup on it. -
Rifle (step 1 of 5). Type a Rifle Name. Tap the Caliber row and pick your cartridge; a common twist rate fills in. Check Twist Rate (in) against your barrel and set Direction to Right or Left. Barrel Length is optional. Next stays off until the name, caliber and twist are filled in.
-
Bullet (step 2 of 5). Tap Choose from Bullet Database and pick your bullet; its weight, diameter, and published BC and drag model come with it. If yours is not listed, tap Type It In Instead and enter its name, weight, diameter, length, drag model (G1 or G7) and BC from the box or the maker’s site. The step also asks for the bullet’s length or its BC when the database has none.
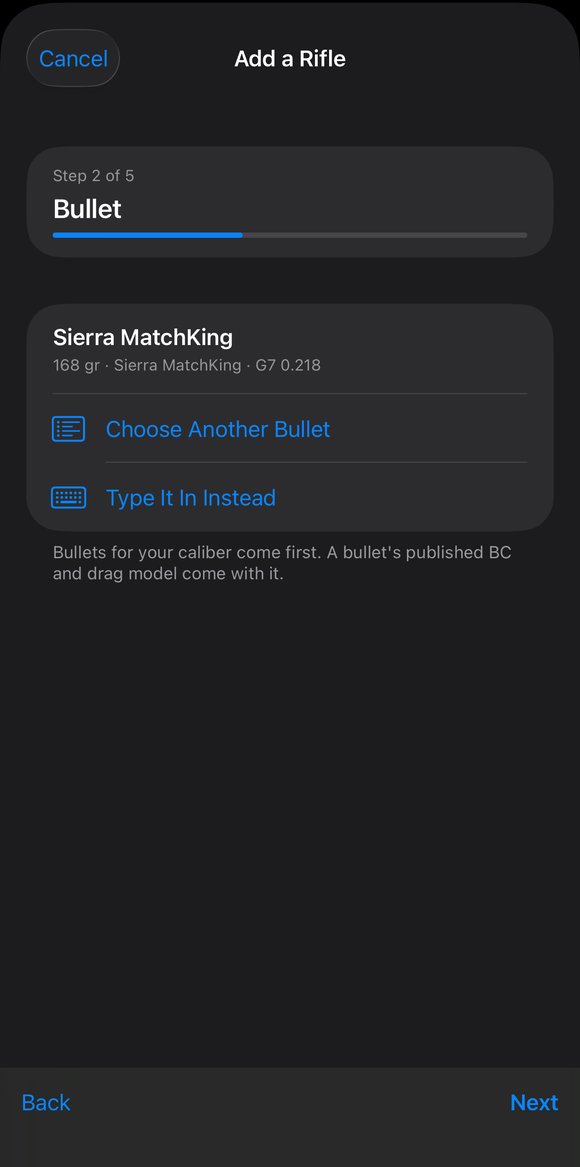
A chosen bullet (Sierra MatchKing, 168 gr, G7 0.218) with Choose Another Bullet and Type It In Instead; Back and Next sit at the bottom. -
Muzzle Velocity (step 3 of 5). Type the speed your chronograph read into Muzzle Velocity (fps). With no chronograph, use the velocity printed on the ammunition box for now. The app notes that your rifle may differ and that you can correct it later from a chronograph string or by truing.
-
Zero & Scope (step 4 of 5), then save. Enter Zero Distance (yd), the distance you zero the rifle at, and Sight Height (in), measured from the center of the bore to the center of the scope. Set the turret to MOA or MIL (MRAD) and type your turret’s Click Value. The starting values are common ones, not yours, so change them to match your rifle and scope. On Review, tap Save Rifle. Nothing is stored until you save, and Cancel leaves nothing behind.
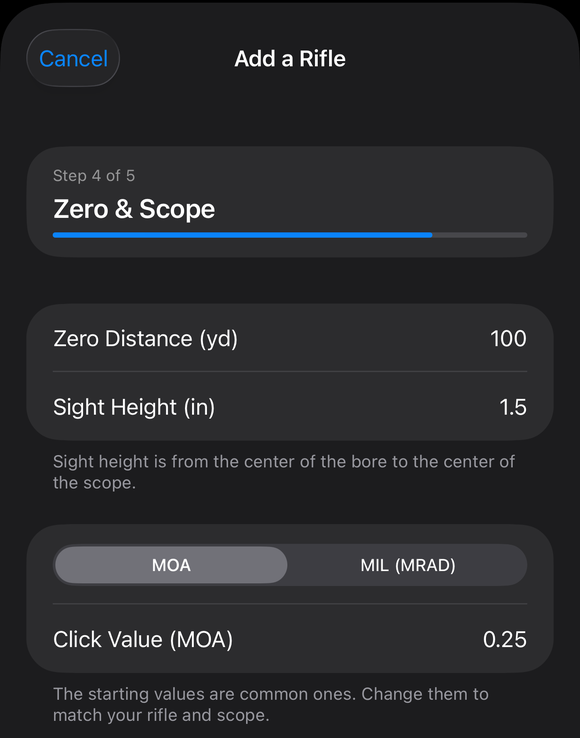
Step 4 of 5, Zero & Scope: Zero Distance 100 yd, Sight Height 1.5 in, the MOA or MIL (MRAD) turret switch and a click value of 0.25 MOA. -
Put the rifle on the bench. Back in the Armory, touch and hold the rifle’s card and choose Use on Bench. The Calculate tab opens with the rifle and its load on the bench. If you started from the first-run offer, the rifle you saved is already chosen, so skip this step.
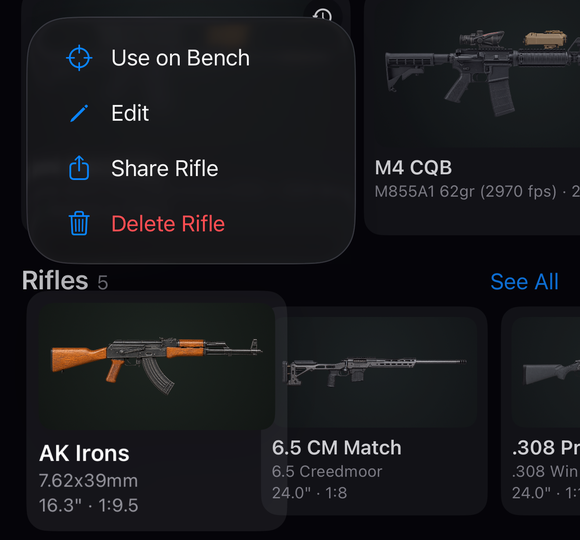
Touch and hold a rifle's card in the Armory: Use on Bench, Edit, Share Rifle and Delete Rifle. -
Set the shot. On the Calculate tab, type the distance into Range (yd) on the Target card. On the Atmosphere card, tap Live Weather to fill temperature, pressure and humidity for where you are, or type them in; it never fetches wind. On the Wind card, enter Speed (mph) and Direction (°): 0° is a headwind, 90° a wind from your right, 180° a tailwind and 270° a wind from your left. If you skip the weather, the results say in orange that the answer used Standard sea-level air, not today’s weather.
-
Tap Calculate and read the hold. Tap Calculate. The results open under a header that says which air the answer was solved in. On the Drop Table tab, find the row for your range: the hold in your angular unit (MOA or MIL), with an arrow showing which way, and the wind hold in the wind column, headed Wind MOA or Wind MIL. For one large readout of the same answer, tap Compact Shoot View under Quick Actions.
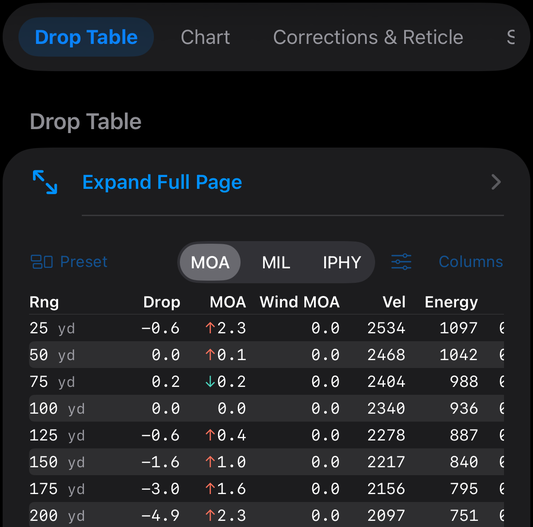
The Drop Table: the unit switch, Expand Full Page, and the range rows with each hold's arrow.
If it went a different way
- Calculate says Your own rifles calculate with Pro. The card under it offers Start 7-day free trial (once; nothing renews and nothing is charged) and Use a sample rifle. Your rifle stays saved either way.
- A line under the bench says Can’t calculate yet. It names the missing number, such as zero distance, twist rate, muzzle velocity, BC, or bullet weight, diameter or length. Tap it to open the part that holds it.
- The Zero line is orange and says Not zeroed with this optic yet. Zero the rifle at the range with the ammo on the bench, then tap Zeroed Here. With iron sights it reads Not zeroed with iron sights yet.
- Your drop at the range does not match the app. Check the muzzle velocity and the weather first, then true the load with real data in Truing / Calibration (More, then Zero & Truing).
The answer is only as good as what you enter: your muzzle velocity, BC, zero, weather and wind. The app says so under the corrections: Mathematical approximation — verify in field. Confirm your holds at the range before you rely on them.
The full detail, with a picture of every screen, is in the Operator’s Guide: Add a Rifle (guided setup). More how-to answers. Questions? Contact support.